

A blown head gasket is one of the most critical issues that can affect your Mustang’s engine performance. This component serves as a barrier between the engine block and the cylinder head, allowing for optimal compression while preventing coolant and oil from mixing. When the head gasket fails, it can lead to severe overheating, which may result in costly repairs if not addressed promptly.
The symptoms of a blown head gasket often include white smoke from the exhaust, a rise in engine temperature, and coolant loss without visible leaks. These warning signs should not be ignored, as they indicate that the integrity of your Mustang’s engine is compromised. Addressing the problem early can save you time and money in the long run.
Replacing a blown head gasket may seem daunting, but with the right tools and a thorough understanding of the process, it can be accomplished in a garage setting. This guide will walk you through the necessary steps, from diagnosing the issue to completing the replacement, ensuring your Mustang returns to its former glory on the road.
Identifying Signs of Overheating and Head Gasket Failure
Properly diagnosing overheating and head gasket failure is crucial for maintaining your Mustang’s performance. Several signs can indicate these issues, allowing you to address them before they lead to severe engine damage.
High Temperature Gauge Readings: One of the first indications of overheating is a temperature gauge that consistently reads above the normal range. If your gauge approaches the red zone, it’s time to pull over and investigate.
Coolant Leaks: Check for any visible coolant leaks under the vehicle. Puddles of coolant may appear, indicating a potential failure within the cooling system or a blown head gasket that is allowing coolant to escape.
White Smoke from Exhaust: If you notice white smoke billowing from the exhaust pipe, it could signal that coolant is entering the combustion chamber due to a compromised head gasket. This symptom requires immediate attention.
Overheating During Idle: If your Mustang tends to overheat when idling or in slow traffic, it may suggest a failing radiator or insufficient coolant flow, which could be exacerbated by a head gasket issue.
Bubbling in Radiator or Coolant Reservoir: If you observe bubbles forming in the radiator or coolant reservoir, it may indicate exhaust gases leaking into the cooling system–a classic sign of head gasket failure.
Milky Oil: A milky or frothy appearance in the engine oil on the dipstick suggests that coolant has mixed with oil, typically due to a blown head gasket. This mixture can severely damage engine components if not addressed promptly.
Being aware of these symptoms is essential for all Mustang owners. Ignoring overheating and potential head gasket failure can lead to costly repairs and engine replacement. Regular maintenance and prompt investigation of any warning signs will help keep your vehicle running smoothly.
Step-by-Step Guide to Removing the Blown Head Gasket
Removing a blown head gasket from your Mustang is a critical repair task. Follow these steps carefully to ensure proper removal and prevent further damage.
1. Essential Tools and Materials
Gather the necessary tools, including a socket set, torque wrench, gasket scraper, and a clean cloth. Ensure you have a replacement head gasket ready for installation.
2. Prepare the Engine
Begin by disconnecting the battery to prevent electrical hazards. Allow the engine to cool completely before starting the removal process.
3. Drain the Coolant
Position a drain pan under the radiator and open the drain valve to remove coolant. This step helps avoid spills and ensures a clean workspace.
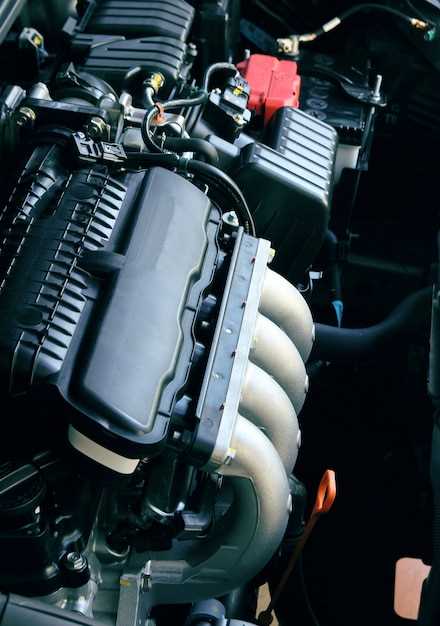
4. Remove Components
Carefully remove any components obstructing access to the cylinder head. This typically includes the intake manifold, exhaust manifold, and any brackets or hoses that might be in the way.
5. Disconnect the Fuel Lines
If applicable, disconnect the fuel lines from the injectors and ensure to cover any open fuel lines to prevent dust and debris from entering.
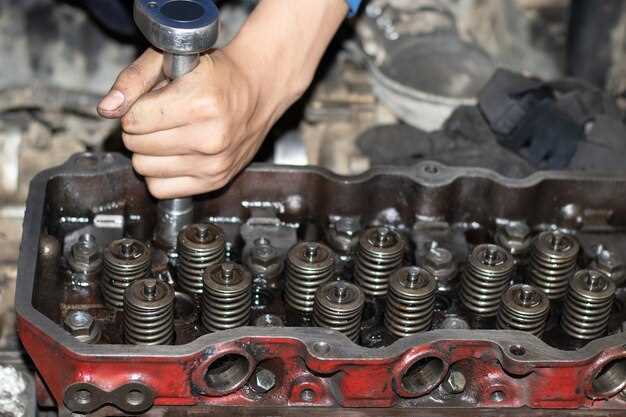
6. Unbolt the Cylinder Head
Using a socket wrench, begin removing the cylinder head bolts in the reverse order of the factory tightening sequence. This method helps relieve tension and prevents warping the head.
7. Remove the Cylinder Head
Once all bolts are removed, gently lift the cylinder head off the engine block. Be cautious of any remaining gasket material that might stick to the surfaces.
8. Inspect for Damage
After removing the head, inspect both the head and the engine block for warping or cracks. Consider having them machined if necessary before installing a new gasket.
9. Clean the Surface
Thoroughly clean all mating surfaces of the cylinder head and engine block with a gasket scraper to remove any remnants of the old gasket. Ensure no debris remains.
10. Install the New Gasket
Place the new head gasket onto the engine block, ensuring it aligns correctly with all bolt holes and coolant passages.
Following this guide will help you successfully remove a blown head gasket from your Mustang, setting the stage for a proper repair and reliable performance.
Proper Installation Techniques for a New Head Gasket
Installing a new head gasket requires attention to detail and adherence to proper techniques to ensure a successful repair. Begin by thoroughly cleaning both the engine block and the cylinder head surfaces. Any debris or residual material can compromise the effectiveness of the gasket. Utilize a suitable gasket remover and scraper to achieve a smooth, flat surface.
Next, ensure that the new gasket is the correct specification for your Mustang’s engine model. Before positioning the gasket, inspect it for any defects or damage. Lay the new head gasket onto the engine block, making sure the holes align perfectly with the cylinders and bolt holes.
When installing the cylinder head, carefully lower it onto the gasket without shifting the gasket out of place. It is crucial to apply the appropriate sequence and torque specifications as outlined in your vehicle’s service manual. Start with the center bolts and work your way outward to evenly distribute pressure across the head and gasket.
After completing the initial torque sequence, it is advisable to allow the engine to sit at room temperature before performing a final torque check. This step ensures that the gasket has had time to settle properly. Re-tighten the bolts in the same sequence as before, ensuring they reach the specified torque values.
Lastly, once the head gasket installation is complete, reassemble all components systematically. Fill the cooling system with the recommended coolant and check for leaks after starting the engine. By following these installation techniques, you can significantly reduce the risk of future gasket failures and ensure your Mustang runs smoothly.


