

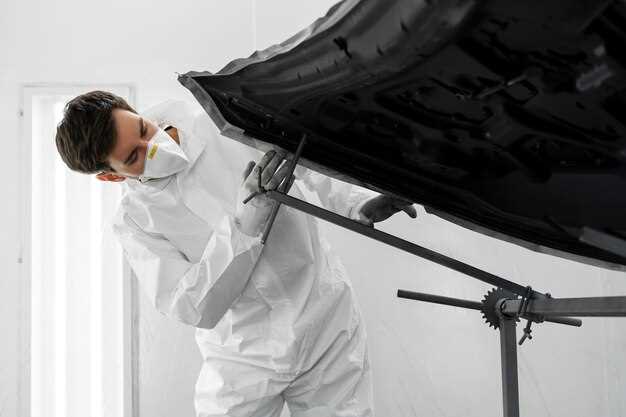
Maintaining the aesthetics and integrity of your Mustang is essential for both performance and pride in ownership. Over time, rust and dents can significantly detract from the sleek bodywork that defines this iconic vehicle. Understanding how to effectively address these issues is crucial for any Mustang enthusiast.
Rust is one of the most common culprits that plague classic and modern Mustangs alike. It can spread rapidly if not addressed promptly, compromising both the structural integrity and appearance of the body. Identifying early signs of rust and taking proactive measures can save you from costly repairs down the line.
Dents, whether caused by minor accidents or environmental factors, can also mar the flawless finish of your Mustang’s bodywork. Learning proper techniques to remove these imperfections not only enhances the vehicle’s look but also preserves its value. This guide will provide you with essential strategies to tackle both rust and dent repairs effectively, ensuring your Mustang remains a head-turner on the road.
Identifying and Assessing Rust Damage on Mustang Bodies
Rust damage on Mustang bodies can significantly compromise the vehicle’s structural integrity and aesthetic appeal. The first step in addressing this issue is to conduct a thorough inspection to identify the extent and location of any rust. Begin by examining commonly affected areas such as wheel wells, undercarriage, and around the rear quarter panels, as these spots are more prone to rust due to moisture accumulation and road debris.
Look for surface discoloration, bubbling paint, or flaking that can indicate the presence of rust. Using a screwdriver or a similar tool, gently probe any suspicious areas. If the metal feels soft or gives way, it’s a sign of advanced corrosion. Pay close attention to seams, joints, and areas where paint may have worn away, as these are often the first to show signs of damage.
Once you identify rust, it’s important to assess its severity. Minor surface rust can often be repaired through sanding, treating, and repainting. In contrast, penetrating rust that has compromised the sheet metal will require more extensive bodywork, such as cutting out affected sections and welding in new panels. Documenting the extent of the rust and determining whether repairs are feasible will be critical in planning your repair approach.
For larger or more widespread rust problems, consulting with a professional may be advisable. However, if you decide to tackle the repairs yourself, ensure you have the right tools and materials on hand, such as rust inhibitors, sanders, and metal welding equipment. Understanding the nature of the rust damage will guide you in deciding the best course of action for restoring your Mustang’s body.
Step-by-Step Process for Rust Removal and Repair
Rust removal and repair are crucial for maintaining the integrity and appearance of your Mustang. Follow these steps to effectively address rust issues.
Step 1: Assess the Damage
Begin by inspecting the affected areas to determine the extent of the rust. Look for any bubbling, flaking, or noticeable holes in the metal. Mark these areas for treatment.
Step 2: Gather Necessary Tools and Materials
Collect the required tools, including sandpaper (various grits), a wire brush, rust converter, primer, paint, and protective gear such as gloves and a mask. Ensure you have a suitable workspace that is well-ventilated.
Step 3: Remove Loose Rust
Use a wire brush or sandpaper to remove loose rust from the damaged area. Start with a coarse grit to tackle heavy rust, then switch to finer grit for smoothing the surface. Proper removal prevents further rust development.
Step 4: Treat the Exposed Metal
After cleaning, apply a rust converter to the exposed metal. This chemical treatment will neutralize rust and prevent it from spreading. Follow the manufacturer’s instructions regarding application and drying times.
Step 5: Prepare the Surface
Once the rust converter is dry, lightly sand the area again to create a smooth surface for primer application. Clean the area to remove any dust or debris that could affect adhesion.
Step 6: Apply Primer
Apply a rust-inhibiting primer to the treated area. This step is vital as it protects the metal from moisture and enhances the adhesion of the paint. Allow the primer to dry completely as per the instructions.
Step 7: Paint the Area
Using automotive paint that matches your Mustang’s color, apply several thin layers to the primed area. This method helps achieve a more uniform finish. Allow each coat to dry before applying the next.
Step 8: Finishing Touches
After the final coat of paint has dried, consider applying a clear coat for additional protection. This step enhances the finish and shields the area from future rust. Let the clear coat cure fully according to product instructions.
Step 9: Regular Maintenance
To prevent rust from returning, regularly wash your vehicle and apply wax. Periodically inspect vulnerable areas and address any new signs of rust promptly.
By following these steps methodically, you can confidently remove rust and repair your Mustang, ensuring its longevity and aesthetic appeal.
Techniques for Fixing Dents and Restoring Body Panels
Repairing dents and restoring body panels on a Mustang involves several techniques that can effectively eliminate imperfections while addressing underlying rust issues. The key methods include:
1. PDR (Paintless Dent Repair)
PDR is a highly effective method for fixing minor dents without disturbing the vehicle’s original paint. This technique utilizes specialized tools to gently push or pull the dented area back into shape from behind the panel. It’s crucial to access the back of the panel, so this method works best on areas with sufficient clearance. PDR is ideal for small dings and circular dents caused by hail or minor impacts.
2. Heat and Cold Treatment
This technique involves using a heat source, such as a heat gun, to warm the dented area, followed by rapid cooling using compressed air. The temperature change causes the metal to contract, which can effectively pop the dent back into place. This method should be used cautiously to avoid damaging the paint or nearby areas.
3. Filler Method
For larger dents or areas that have suffered paint damage, a body filler may be required. Start by carefully sanding the damaged area, ensuring any rust is removed. Then, apply a quality body filler, molding it to match the contours of the panel. Once cured, sand it smooth and repaint for a seamless finish.
4. Hammer and Dolly Technique
This traditional method is particularly useful for more significant damage. A dolly is placed behind the panel, and a hammer is used to gradually reshape the dent. This method requires skill to avoid creating high spots in the metal. After reshaping, treat any exposed metal with rust preventive compounds to ensure long-lasting repairs.
5. Replacement Panels
When damage is extensive, replacing the entire body panel may be the best solution. Select high-quality OEM or aftermarket panels to ensure a perfect fit. Before installation, address any rust issues by treating the surrounding areas and applying a protective coating. Proper alignment and securing the panels are essential for a successful repair.
Regardless of the technique chosen, it’s vital to properly treat rust areas to prevent future complications. Ensuring a thorough inspection and timely repairs will help maintain the integrity and appearance of your Mustang’s body.


